WordPress: How to Manually Install Using File Manager on Foundation Interface
Step 1: Download WordPress
- Download the WordPress package to your local computer from https://wordpress.org/download/.
Step 2. Create MySQL Database and User
- Go to Hosting Dashboard.

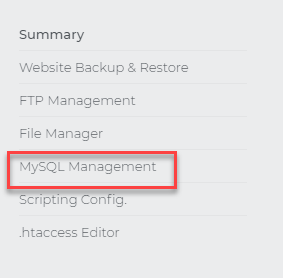
- In the left sidebar, click MySQL Management.
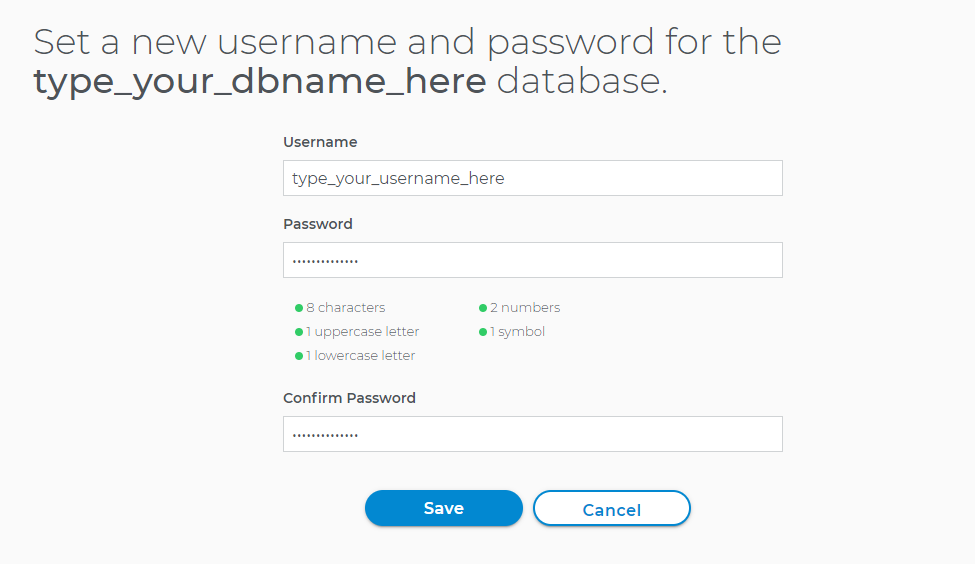
- Click on Add MySQL Database and fill in the database name, username, password, and confirm password.


Step 3: Upload WordPress to Hosting Account.
- Go to Hosting Dashboard.
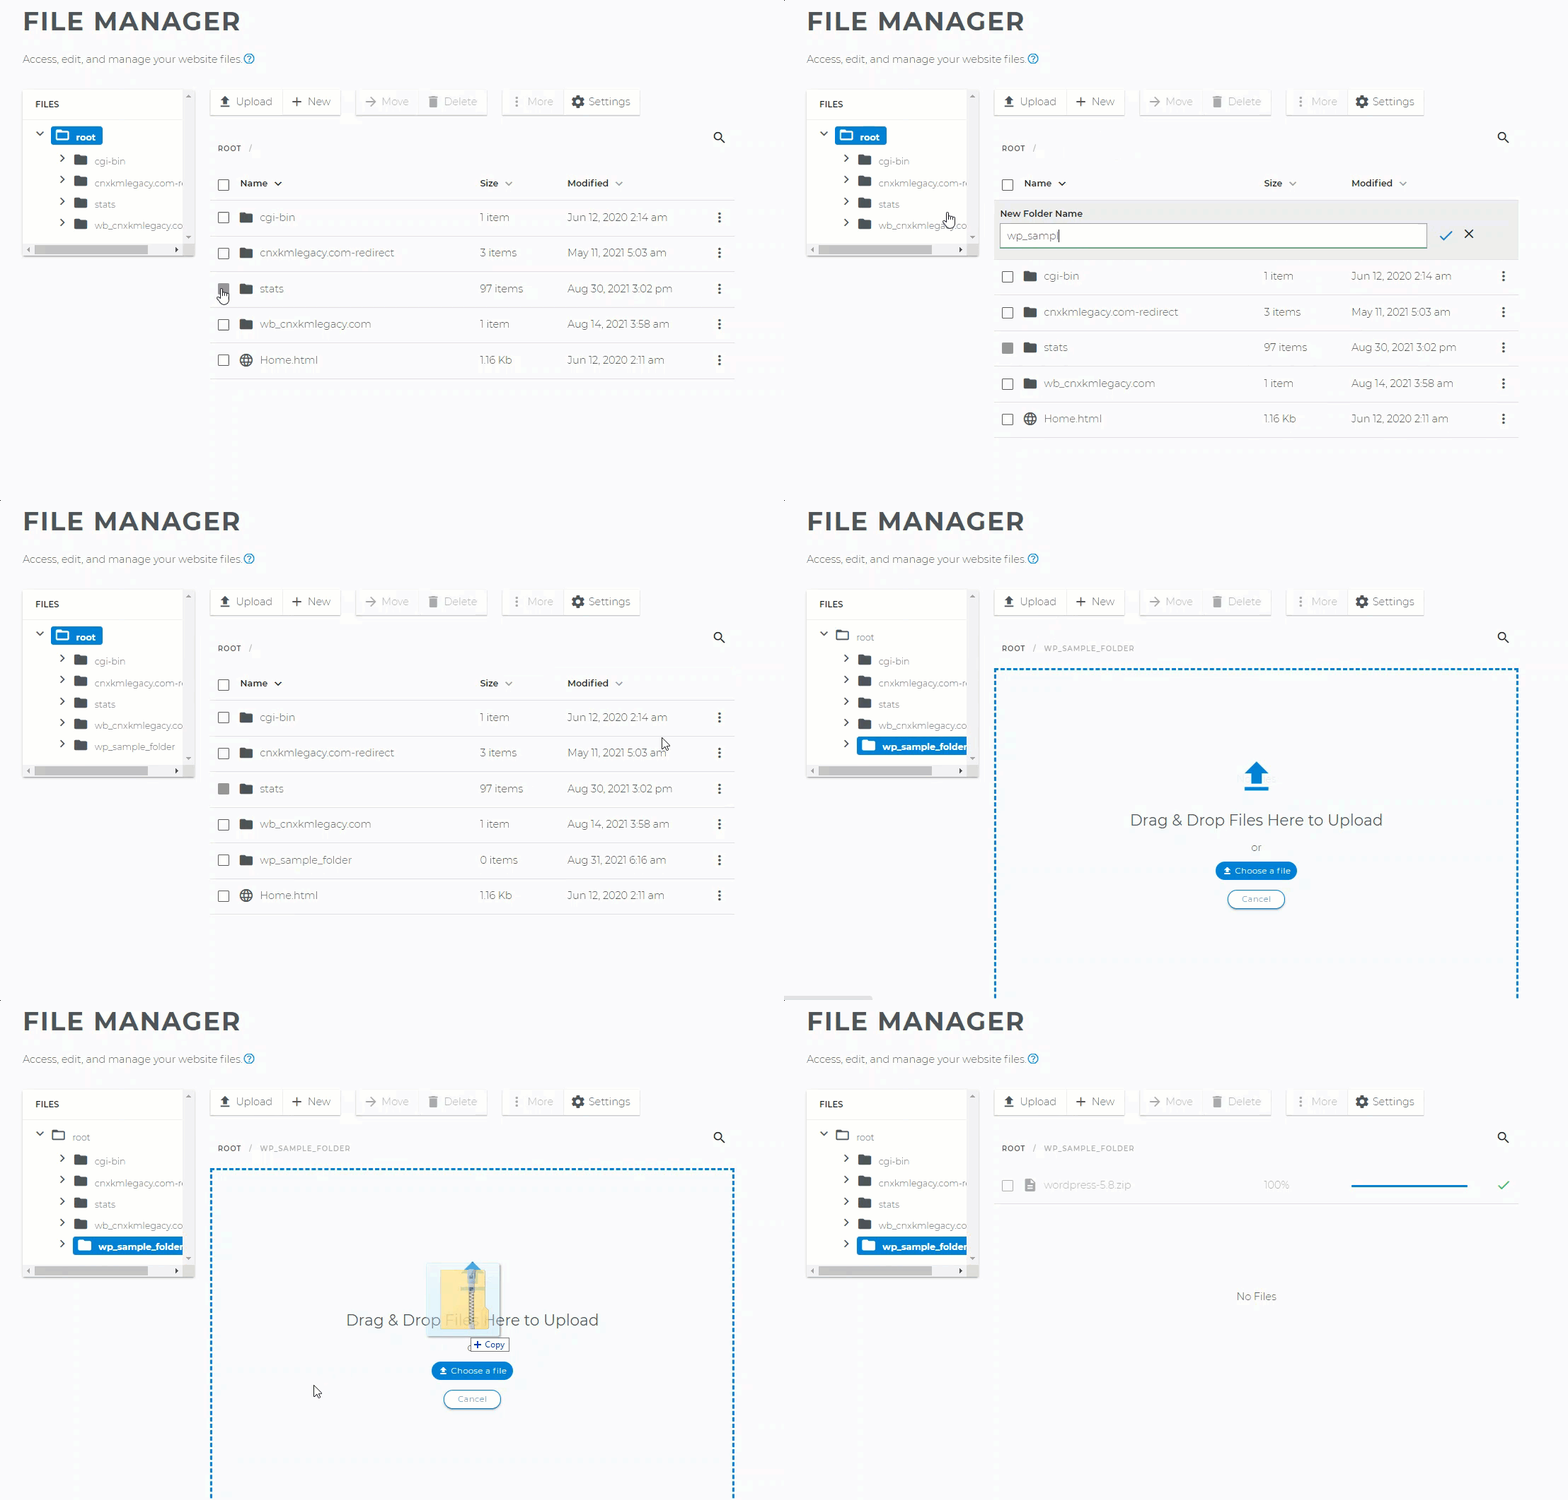
- In the left sidebar, click File Manager.
- Once inside the File Manager, click on the (+) New in the options tab.
Step 4: Extract WordPress Files
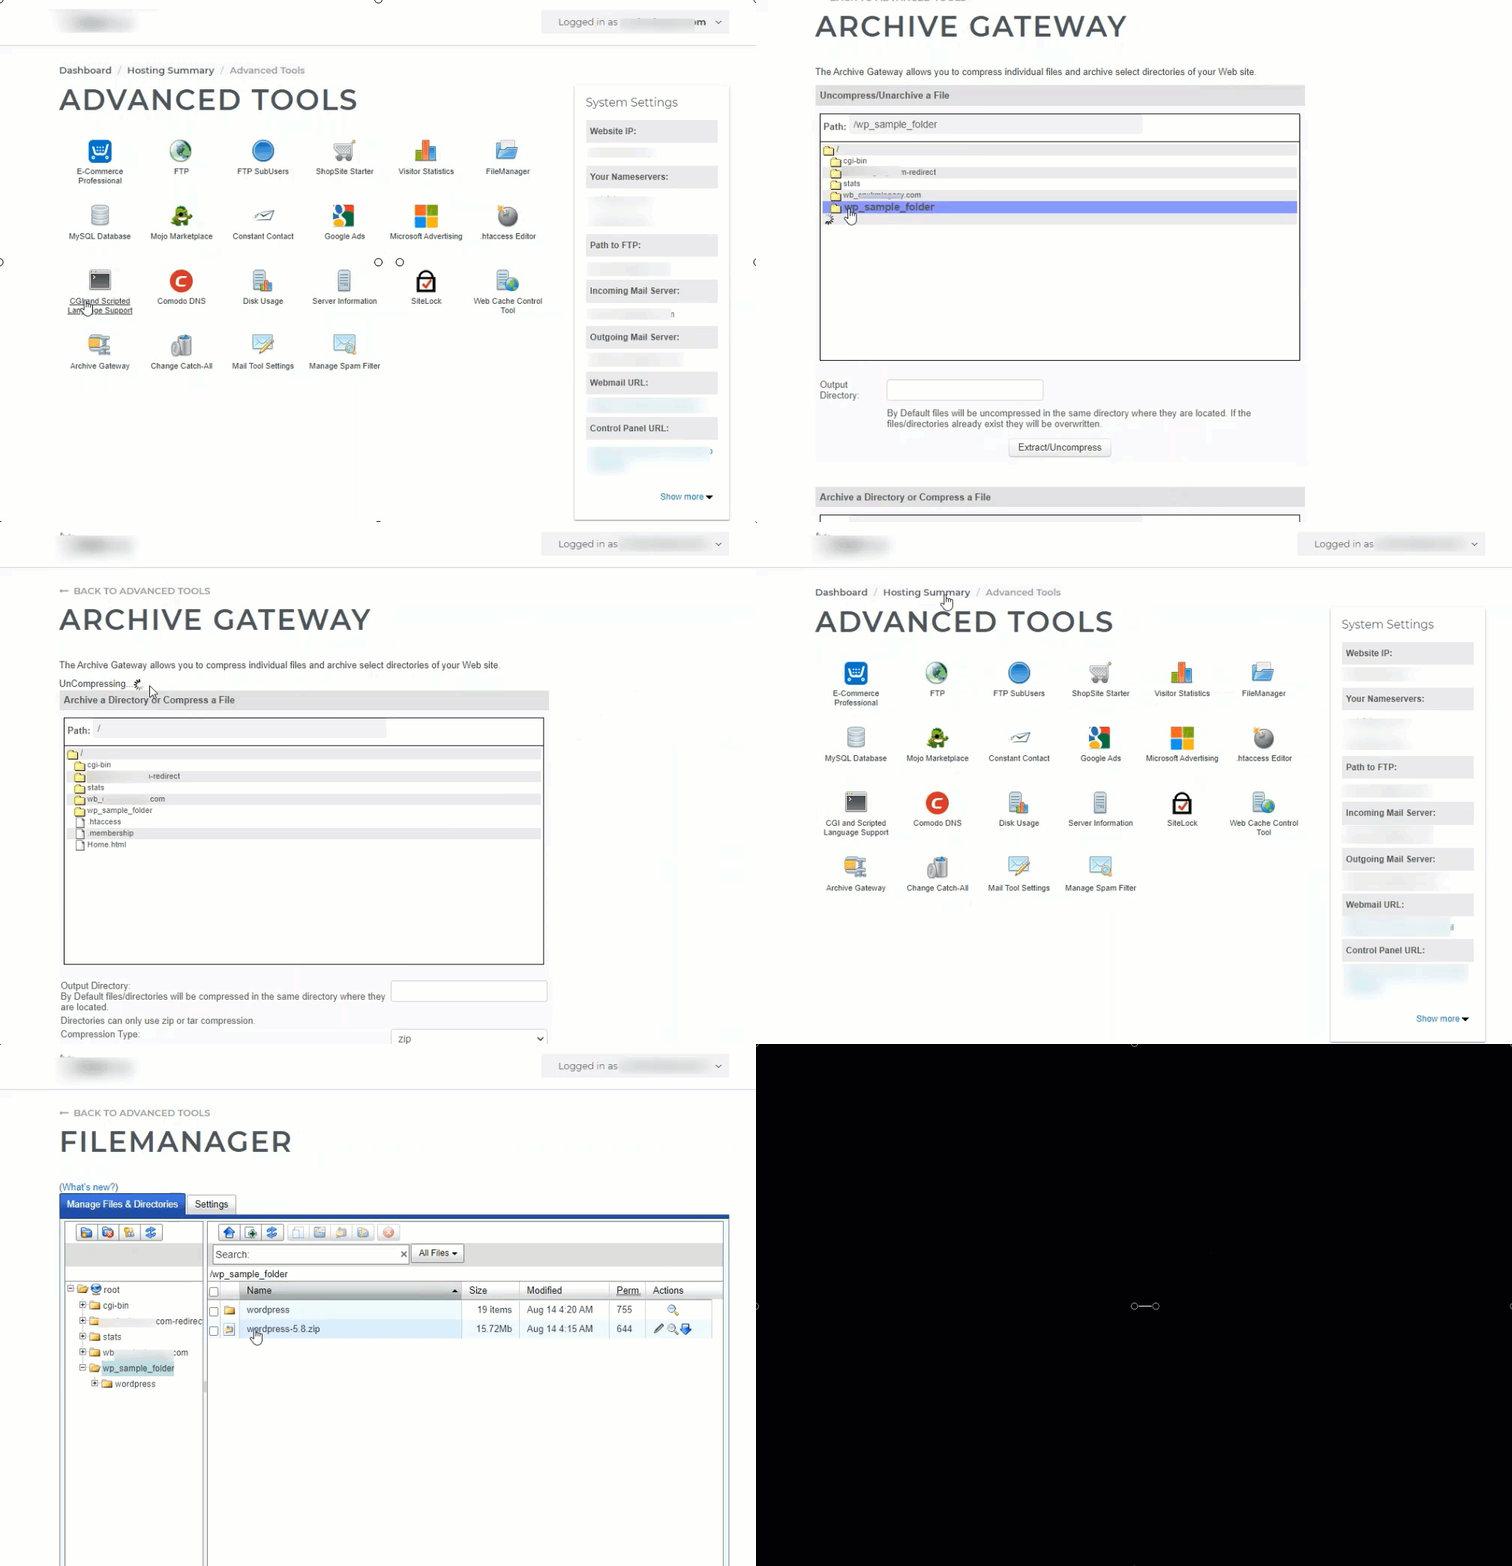
- Go to Advanced Tools.
- Click on Archive Gateway.
- Select the folder you've created for your WordPress, then click Extract/Uncompress.
Step 5: Configure wp-config.php
The wp-config-sample.php file contains the database information and tells the WordPress application from which database to pull data. This step must be completed to ensure the correct database information is associated with the WordPress installation.
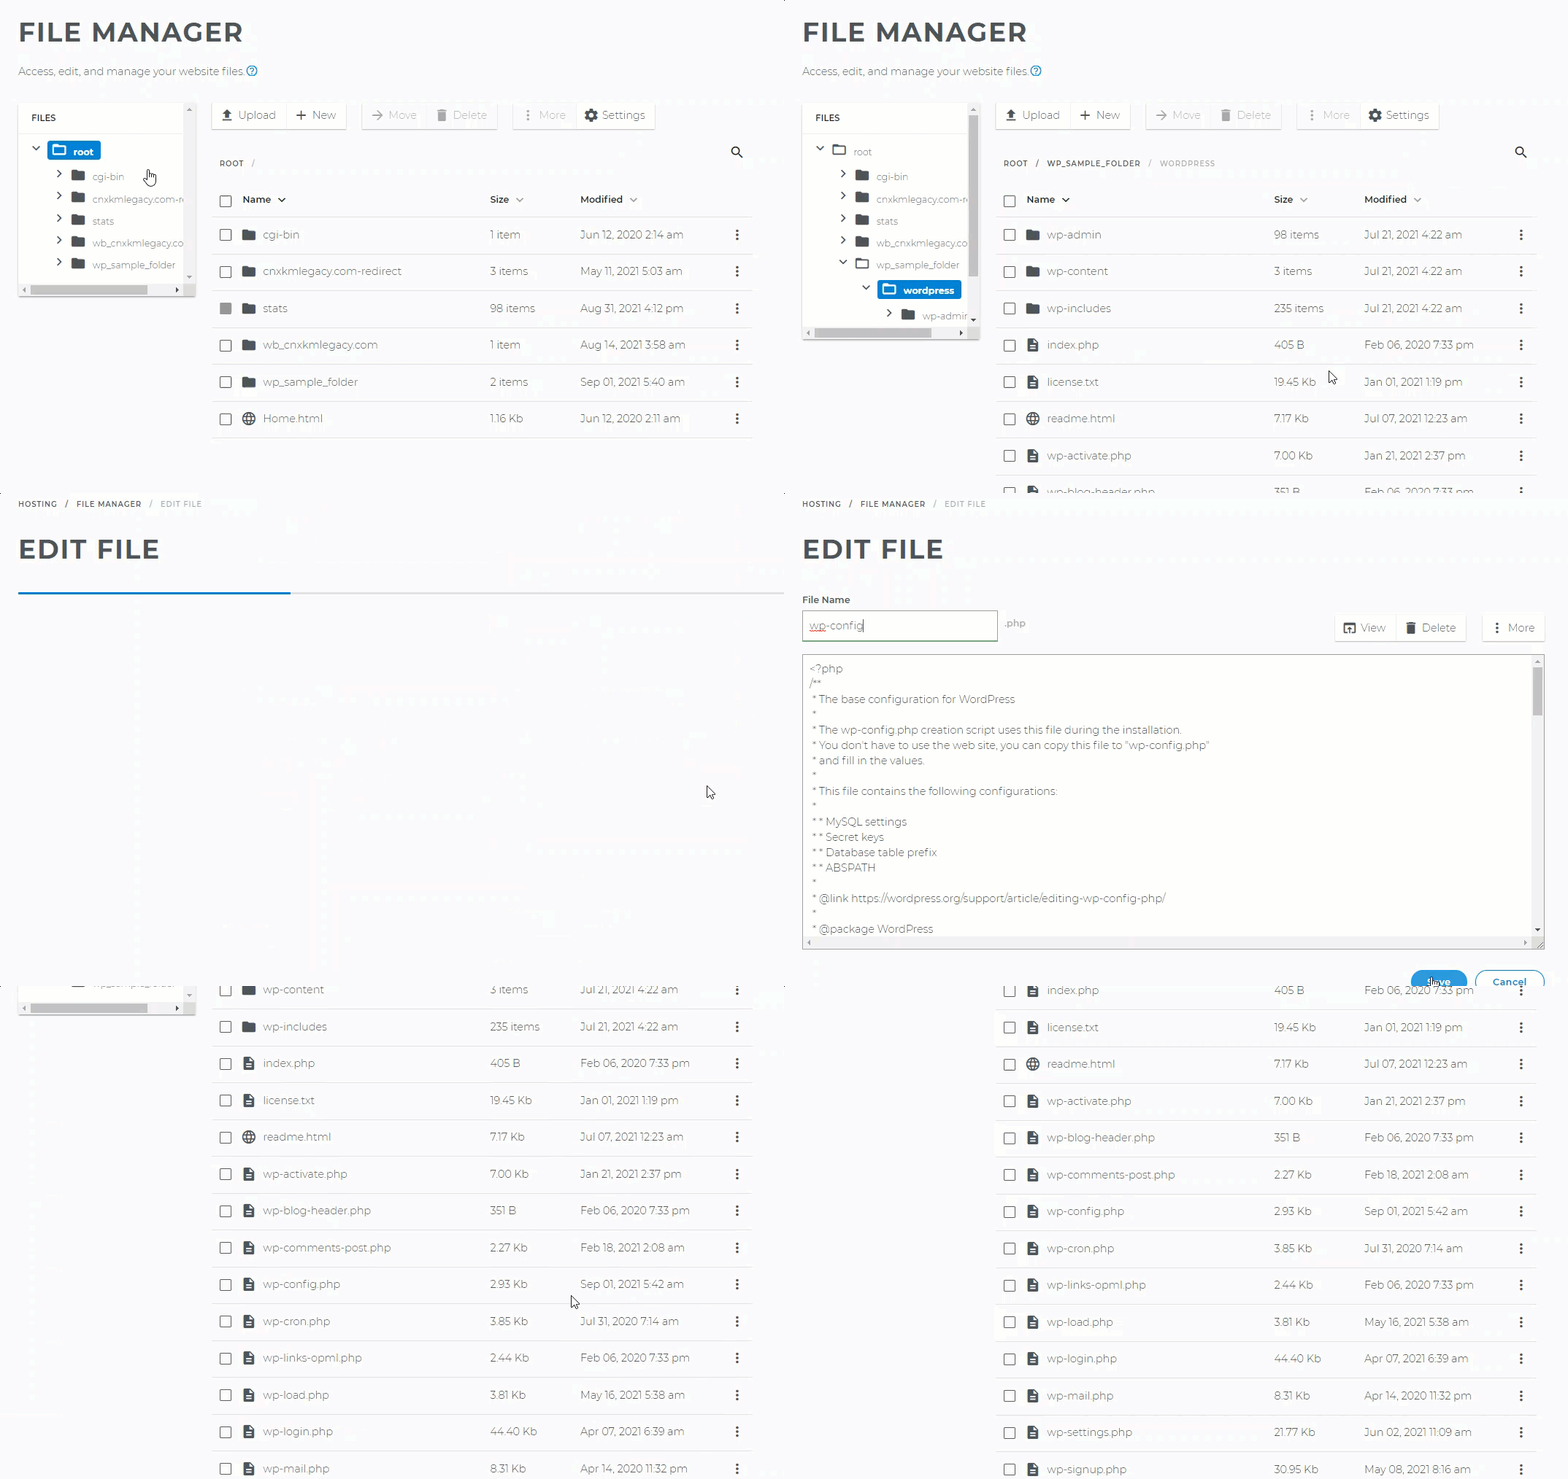
The wp-config-sample.php file can be found in File Manager in the folder where WordPress is installed.
- Go to Advanced Tools.
- Click on File Manager.
- From the left-hand navigation menu in File Manager, click the folder you created for your WordPress file.
- In the right-hand panel of the File Manager, locate the wp-config-sample.php file.
- Click on the Options menu next to the file/folder, then hit Edit.
- Change the file's name to wp-config.php, then click the Save button to save the change.
7. A second pop-up box will appear.
8. When the file opens, look for the following information:
define('DB_NAME', 'database_name_here');

	/** MySQL database username */
	define('DB_USER', 'username_here');

	/** MySQL database password */
	define('DB_PASSWORD', 'password_here');

     /** MySQL hostname */
     define('DB_HOST', 'localhost_here');
- Replace database_name_here with the name of the database you created (above in Step 2: Create MySQL Database and User ⤴).
- Replace username_here with the username of the database you created.
- Replace password_here with the password of the database that you created.
- Replace localhost_here with the MySQL server name found on the right-hand panel of MySQL.
9. Once done, click the Save button to save the changes.
Step 6: Run the Installation.
Open a new browser window and enter your domain to run the installation script. Depending on where you installed the script, you will be automatically redirected to either of the following URLs: If you uploaded WordPress to the domain's root folder, you should be redirected to:
https://example.com/wp-admin/install.phpIf you uploaded WordPress to a subfolder of your domain's directory, then the URL will be in this format:
https://example.com/yoursubfolder/wp-admin/install.php
Step 7: Complete the installation.
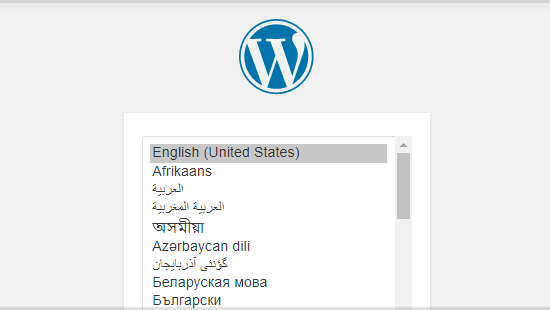
- Once you access your correct WordPress URL in a browser, you will see a WordPress setup page prompting you to select your preferred language. Select your preferred language and click the Continue button.
- You should now see a welcome page that says, "Welcome to the famous five-minute WordPress installation process!" Under the Information needed section, you'll need to fill out the following fields:
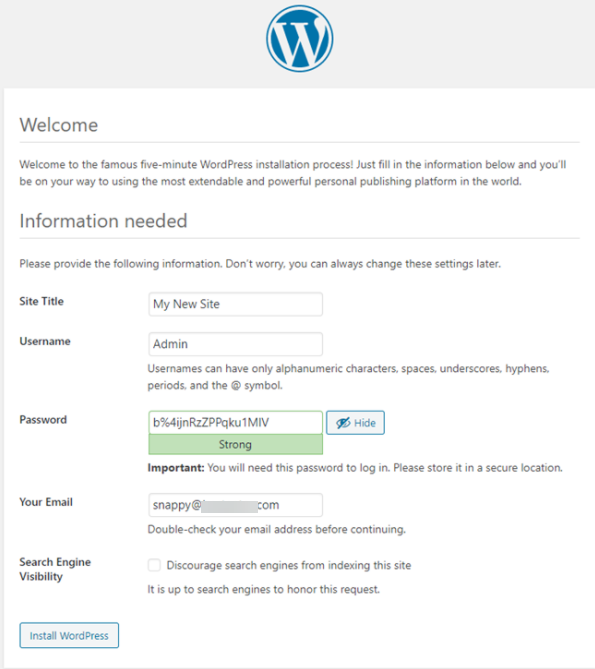
- Click the Install WordPress button, and you should be taken to the final screen, which says, "WordPress has been installed. Thank you, and enjoy!". It will display the username you chose on the previous page and a placeholder for your password. Click the Login button to log in to the WordPress Admin Dashboard to begin building your site!